Legend Placement
If there is a Legend rectangle in the print template being placed then after all viewports have been placed, a dialog will be displayed prompting the user to select which features should be part of the legend.
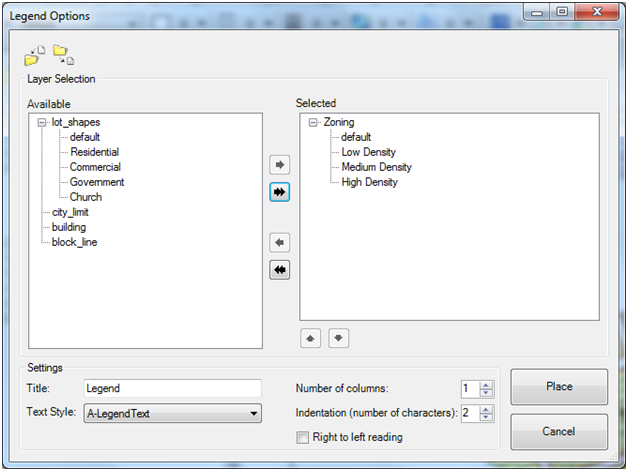
The left side shows the features that are available in the current session. Any of these features can be selected and moved to the right side (those features that will appear in the legend). The double arrow icon will move all features to the Selected column. Features can be removed by using the left pointing arrows.
The order of the features in the legend can be controlled by the up and down arrows at the bottom of the Select column.
The legend can be customized by providing a title and selecting a Text Style for the legend text.
The user can specify the number of columns by keying in a number or using the arrows to select the number.
The indentation sets the number of spaces the class names will be indented.
Right to left reading will place the legend symbols on the right side of the text as opposed to the default which is on the left.
After selecting the features to make up the legend, select Place and the legend will be created in the print model.
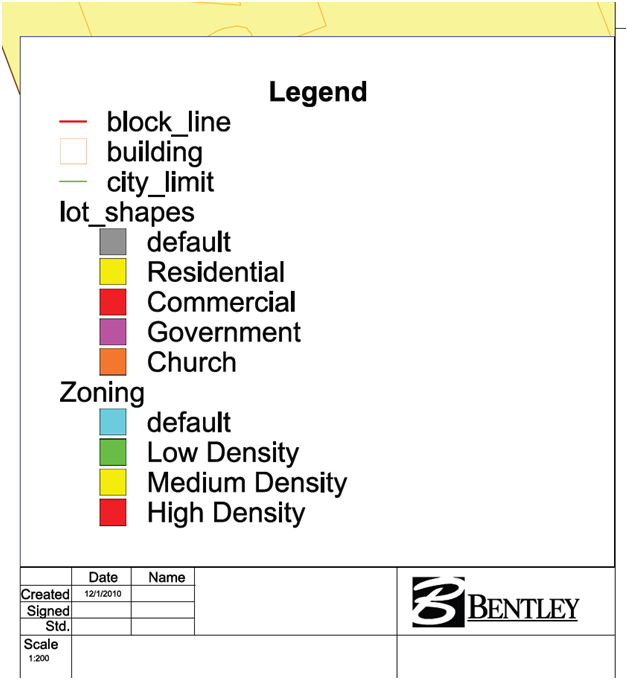
If more than one legend is defined in the print template then the dialog will be displayed again until all legends are defined.
When the last legend is defined, the Print model is opened for post processing. The final legend is displayed below.
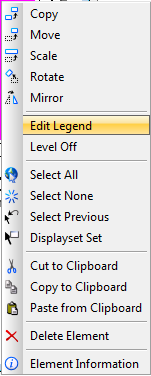
To modify the legend after placement, select the legend and hold down the right mouse button until the context menu is displayed. Select Edit Legend. The dialog used to place the legend will be displayed allowing any changes to be made.